ELE207 Turtlebot Lab
👋 Hey there, Future Roboticists!
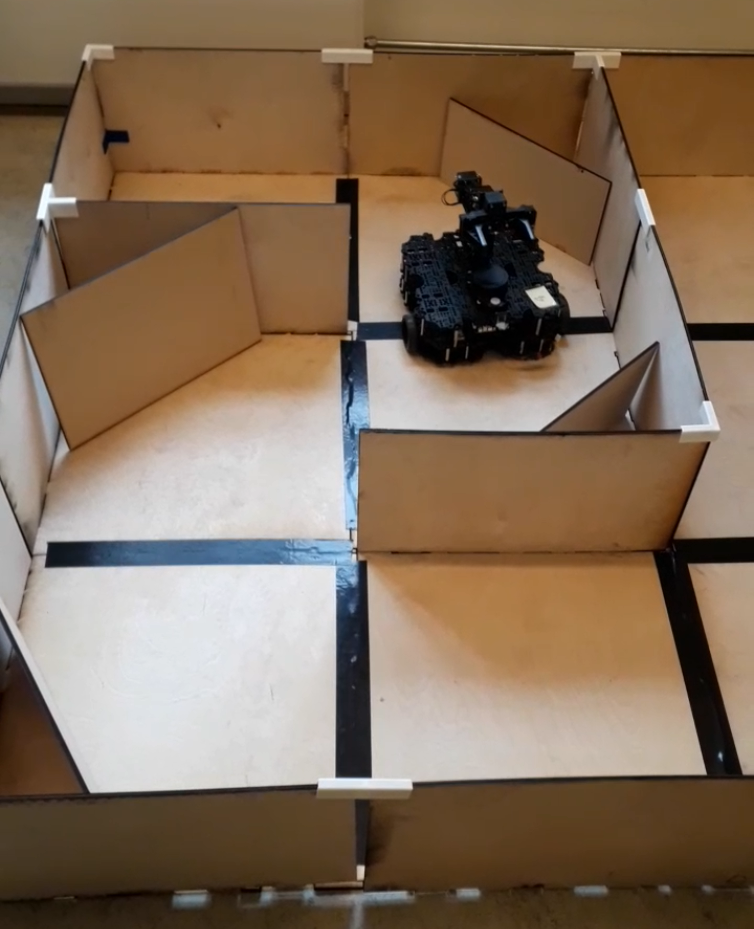
Welcome to ELE207’s lab session, where your imagination meets real-world tech! 🚀 Today you are going to implement an navigation logic combined with control theory, on a TurtleBot 3 robot. Your mission, is to help the Turtlebot to make it out of a maze!
Our maze is set, your vehicle awaits. Get ready to program and fine-tune those PID parameters! 🤖🔧

Equipment
- Your personal PC with the Virtual Machine running
- Matlab R2022a to R2024b (not newer, not older)
- Matlab will need the ROS Toolbox
- A real life Turtlebot 3
- Good mood!🌈
Before the lab
- Get together in a group of 2-3 people
- Find your way to Verftet, Øyrane
Report
There is no need to hand in a report for this lab. Signed attendance and a cool video of the final product will suffice as approved lab exercise.
Instructions
Setting up the Virtual Machine Network
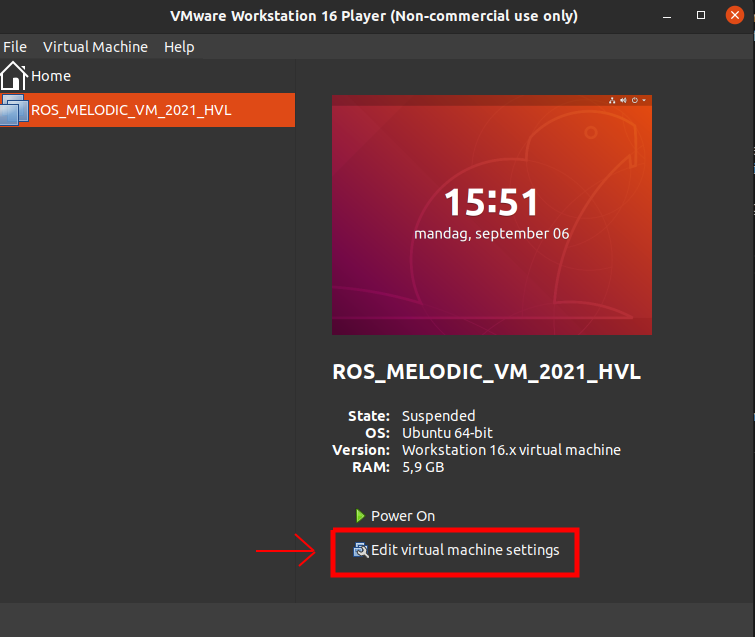
- Select your virtual machine on the left bar
- Click Edit virtual machine settings
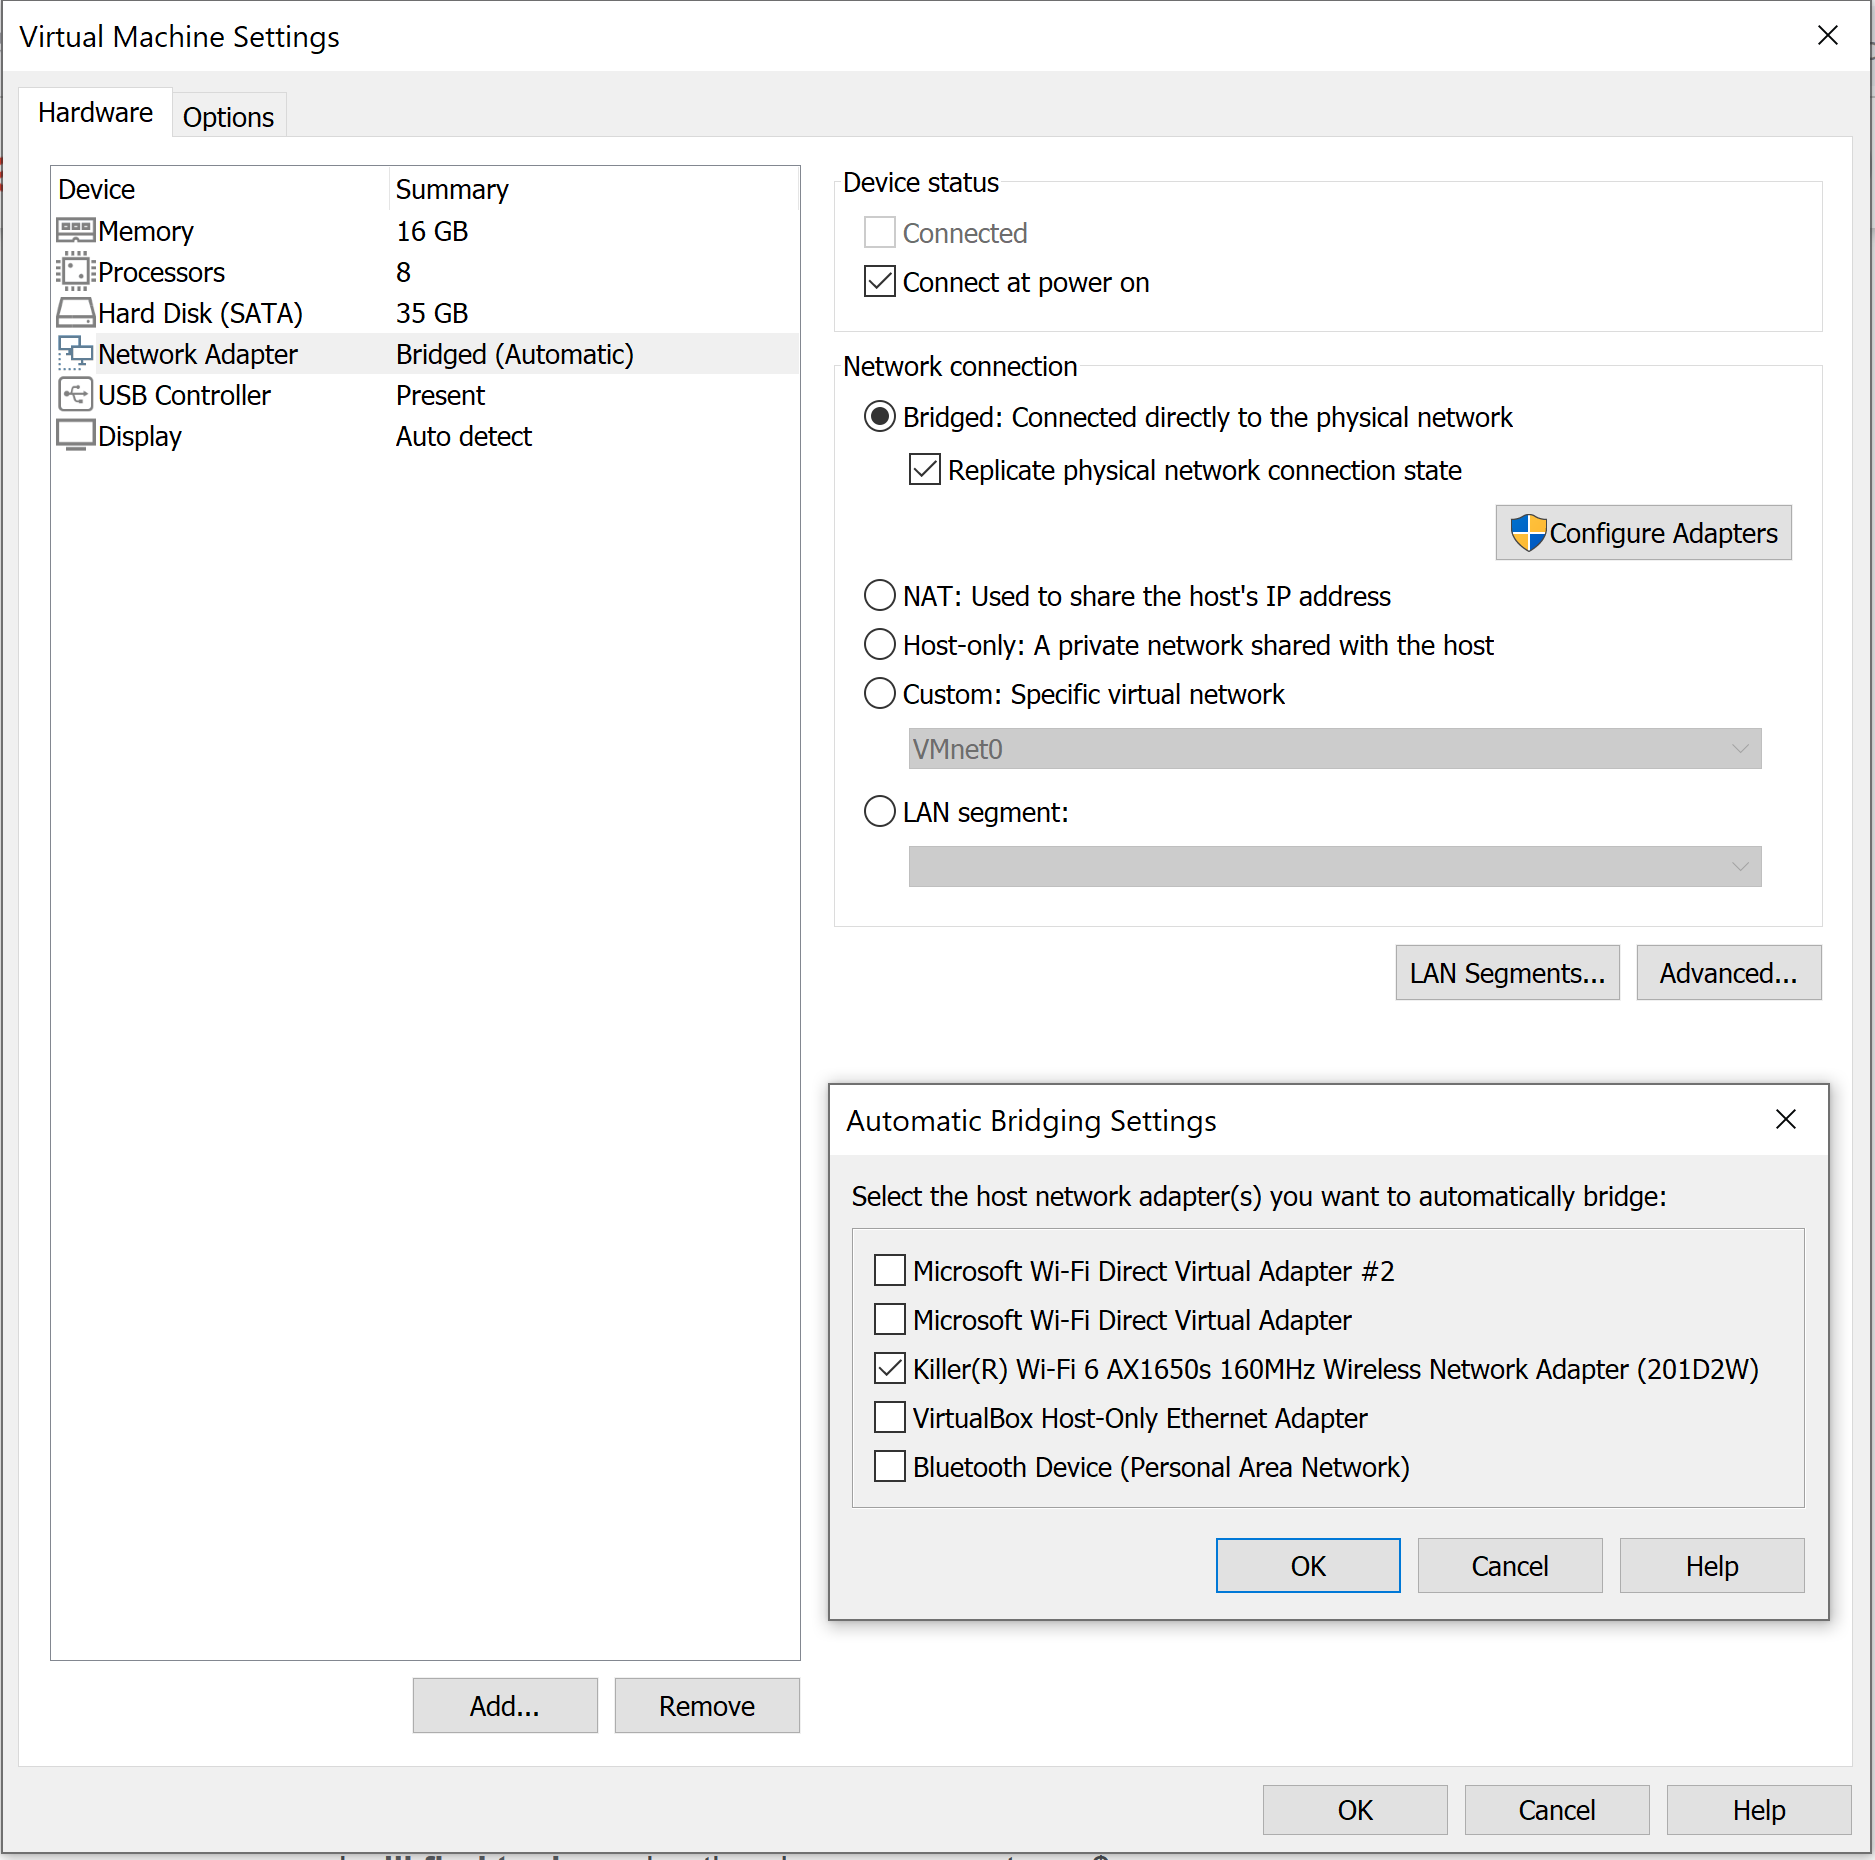
- Select Network Adapter
- Select the first option Bridged: Connected directly to the physical network also check the Replicate physical network connection state
- Go to Configure Adapters and ONLY select the wireless adapter which your PC has. In our case it is “Killer(R) Wi-Fi 6 AX1650 160MHz Wireless Network Adapter”
- Save everything and start your virtual machine.
- The password for the VM is student
Connecting to the Turtlebot
Once your Virtual Machine is on, make sure the networking setting worked, by checking that you are connected to the World Wide Web. This you can do by checking the nettwork status in the upper right corner (should show an ethernet wired connection) or by just opening the browser. Now say goodbye to the World Wide Web by changing the wifi connection from eduroam or any other connection, to robot_lan_2G password: mikkemus. This is the local network that we will use to communicate with the Turtlebots. It unfortunately doesn’t have internet, but that’s not really a problem since you guys are pros and will not need to google anything :sweat_smile:
It’s time to turn on the Turtlebot 3 you’ve been assigned! Plug the battery in and turn it own by using the little switch under the camera. The robot should make a little sound as tit turns on.
While the turtlebot get’s ready, open a terminal in the Virtual Machine: Crtl + Alt + t
rocotics@ubuntu:~$ ifconfig
make sure that the IP address shown is in the same local network as the Turtlebots.
Info: Being in the same local network can be seen by having the same three first numbers of the IP address! In this case it should start with 172.31.1.***
The IP address of the Turtlebot assigned to you will be provided to you by the teacher. This IP address is what you will use to connect to the Turtlebot. This type of connection is called an ssh connection (Secure Socket Shell), it’s a network protocole that allows users to access computers on a network in a secure way.
Open a terminal window Crtl + Alt + t in the virtual machine and use this command by changing IP_ADDRESS_TURTLEBOT with the actual IP address:
rocotics@ubuntu:~$ ssh ubuntu@IP_ADDRESS_TURTLEBOT
The terminal should then ask you for a password, the turtlebot’s on-board computer’s password. Which is turtlebot. Once the password has been accepted, the terminal’s prompt will change to the turtlebot’s username, like this:
ubuntu@ubuntu:~$
You are now controlling the turtlebot’s on-board computer, a Raspberry Pi 3B.
ROS environment configuration
The default middleware that ROS 2 uses for communication is DDS (Data Distribution Service). In DDS, the primary mechanism for having different logical networks share a physical network is known as the Domain ID. ROS 2 nodes on the same domain can freely discover and send messages to each other, while ROS 2 nodes on different domains cannot. All ROS 2 nodes use domain ID 0 by default. To avoid interference between different groups of computers running ROS 2 on the same network, a different domain ID should be set for each group. So each student will have a domain ID given to you by the teacher. It will be a number between 0 and 101, inclusive. This domain ID has to be given to the turtlebot and to your virutal machine.
On the turtlebot
So in the terminal which is connected to the turtlebot, write those commands:
ubuntu@ubuntu:~$ nano ~/.bashrc
This will open a file in the terminal, with the arrows go all the way down until you find: ROS_DOMAIN_ID=30
Change the 30 with your personal domain ID, then save and close the file with Crtl + s then Crtl + x
You then need to source the file you just modified, this is done with this command:
ubuntu@ubuntu:~$ source ~/.bashrc
The setup is complete! Time to control the turtlebot!
Turtlebot bringup
To get all the ROS nodes that will allow you to control the turtlebot up and running, you have to do what we call bringup. You do that in the terminal window which is connected to the turtlebot with this command line:
ubuntu@ubuntu:~$ ros2 launch turtlebot3_manipulation_bringup hardware.launch.py
The turtlebot should make a sound and the open manipulator (the arm) should rise to start position. Your turtlebot is now ready to get commands from your script!
Implementing a simple navigation algorithm that uses a PID
Open the given Matlab script and implement the PID controller which navigates your Turtlebot robot through the maze. This is the link to the Matlab script The steps to complete this task are outlined in the script, follow the TODOs and other comments and you’ll be able to control the turtlebot.
The current script uses a simple wall following algorithm that controles the distance to the left wall. The distance is controlled through the angular velocity of the robot. So the PID controller will decide how the robot corrects its distance to the left wall, with more or less reactivity, oscillations, steady-state error, etc
It is expected of you to implement the PID and to tweak the gains for an optimal and smooth navigation through the maze.
Test and tweak your script
Now comes the fun part! :smile:
Make sure the turtlebot is in a safe environment before you start controlling it!
It’s time to run your simple navigation script, start your Matlab script and see what happends … it’s going to be a bit messy … that’s why you have to tweak the parameters to make it work in this maze!
Change the values of the different gains and test it on the Turtlebot. Don’t forget to save the file before you run it again for testing purposes and don’t forget to put your Turtelbot in a safe environment.
Advanced mode
For those that have time and want to make a more advanced navigation logic, here is an introduction to a simple Breitenberg Vehicle algorithm:
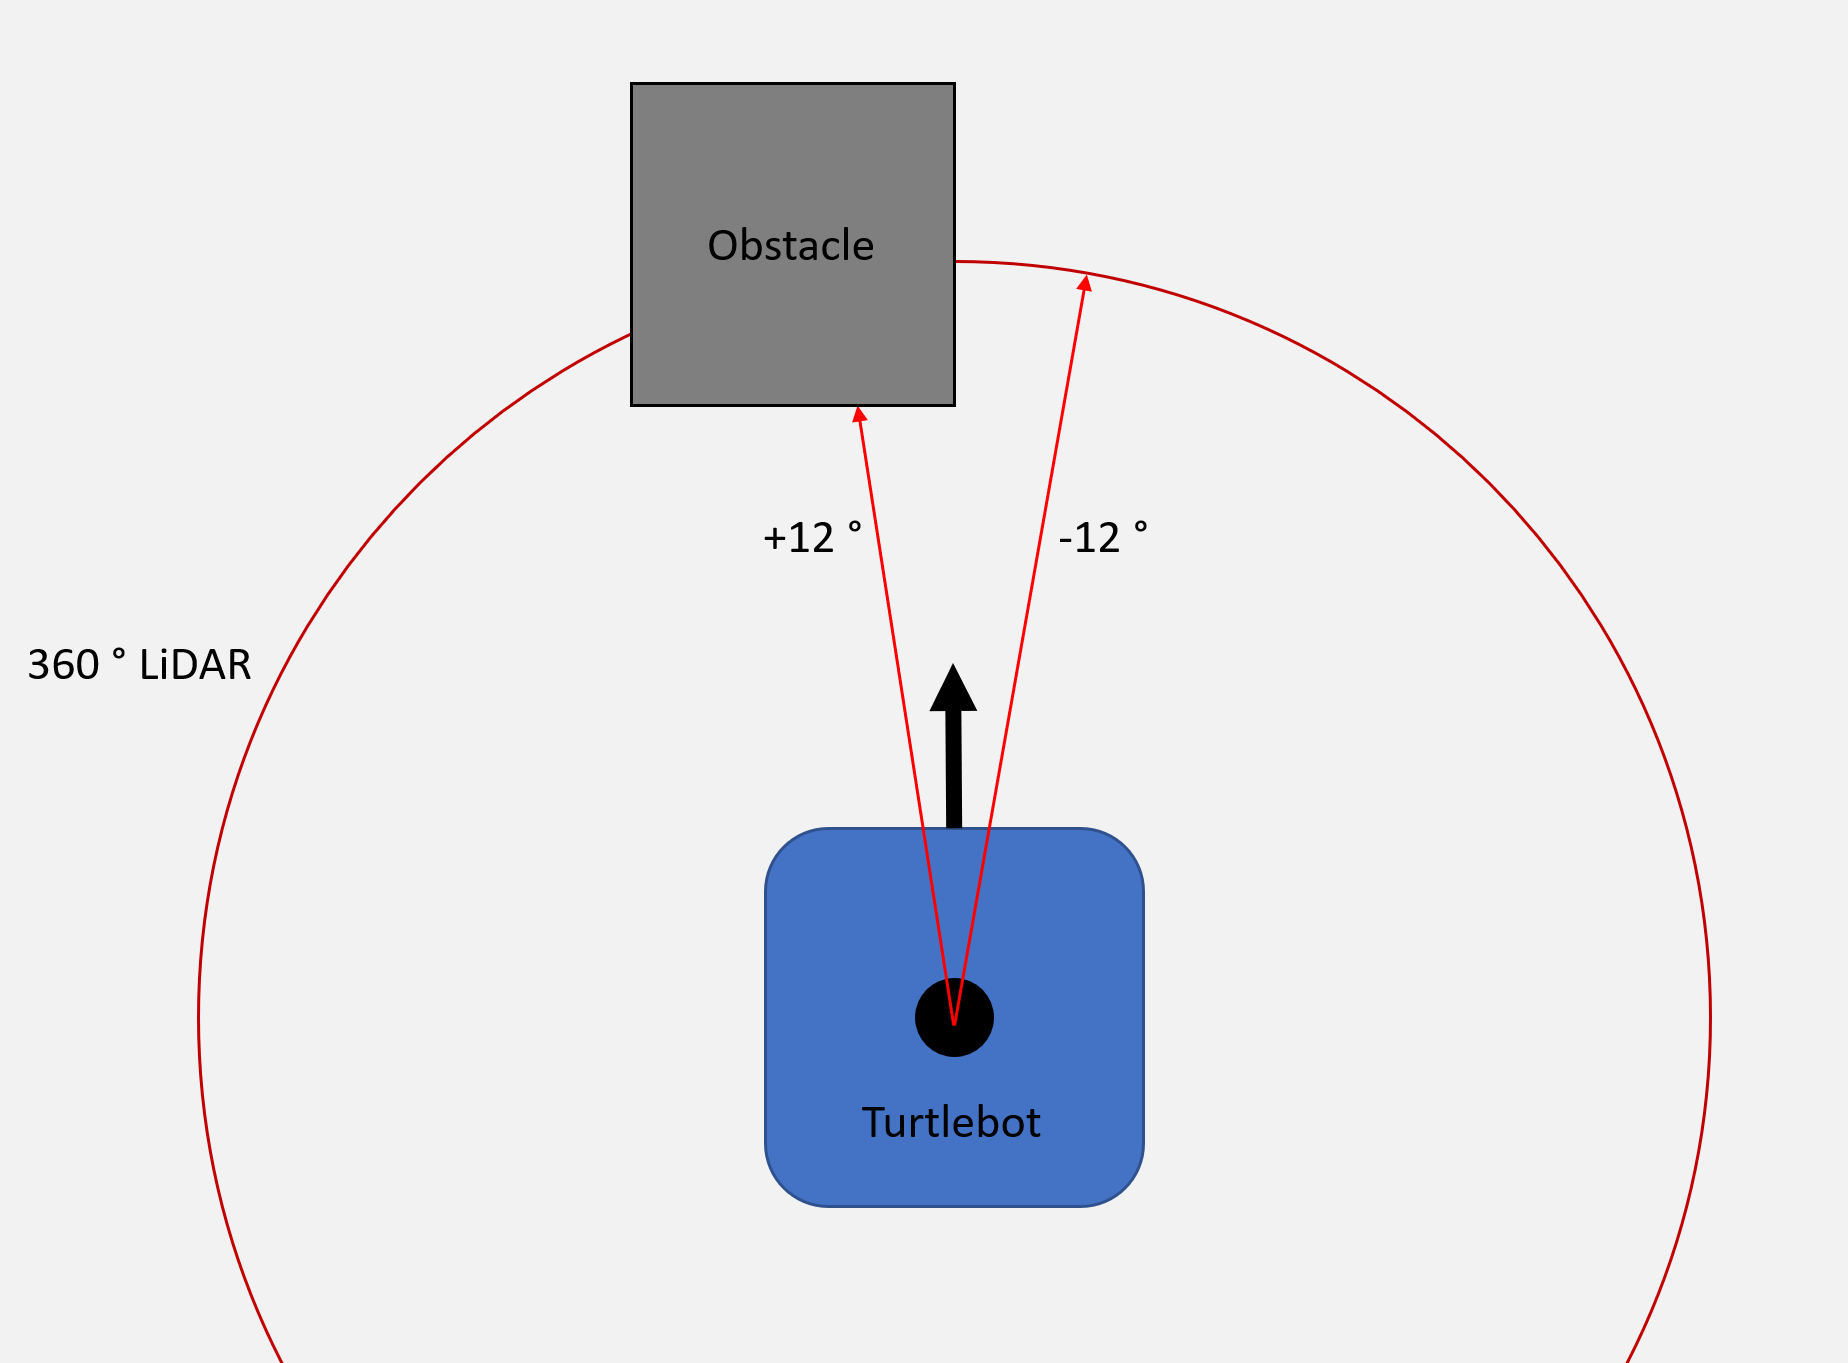
The Turtlebot is controlled using two points (+a and -a in degrees) from the 360 degree onboard LiDAR. With the LiDAR data as input, the robot should show the following behaviours:
- No obstacles are detected -> move forward
- Only the left sensor detects an obstacle -> turn right with PID
- Only the right sensor detects an obstacle -> turn left with PID
- Both sensors detect an obstacle -> stop