Simulation (Gazebo)
In this tutorial, you will learn about simulation in ROS using Gazebo. You will also learn briefly the physical andy dynamic (inertia and collision) properties of an object and how to create a simulated world, control your robot in this world and add sensors.
All the steps we are doing in this page are readily available in the Github page as my_robotarm_pkg. However, in through the tutorials in this page, we will try to understand how such a full-robot-package can be created and learn about what each file and folder does. Following the steps with me will help you massively when you create your own robot in the semester project.
Gazebo
Gazebo is the most used simulator in ROS. It has integrated physics rules like gravity, colision, light distribution with reflection and refraction properties, mass and inertia etc. Now, we will see how to set the Gazebo for very basic usage.
Although RViz and Gazebo seems pretty similar, they are used in completely different purposes. Rviz is for visualization (of robots, sensors etc.), Gazebo is for simulation (of robots, objects, environment etc.).
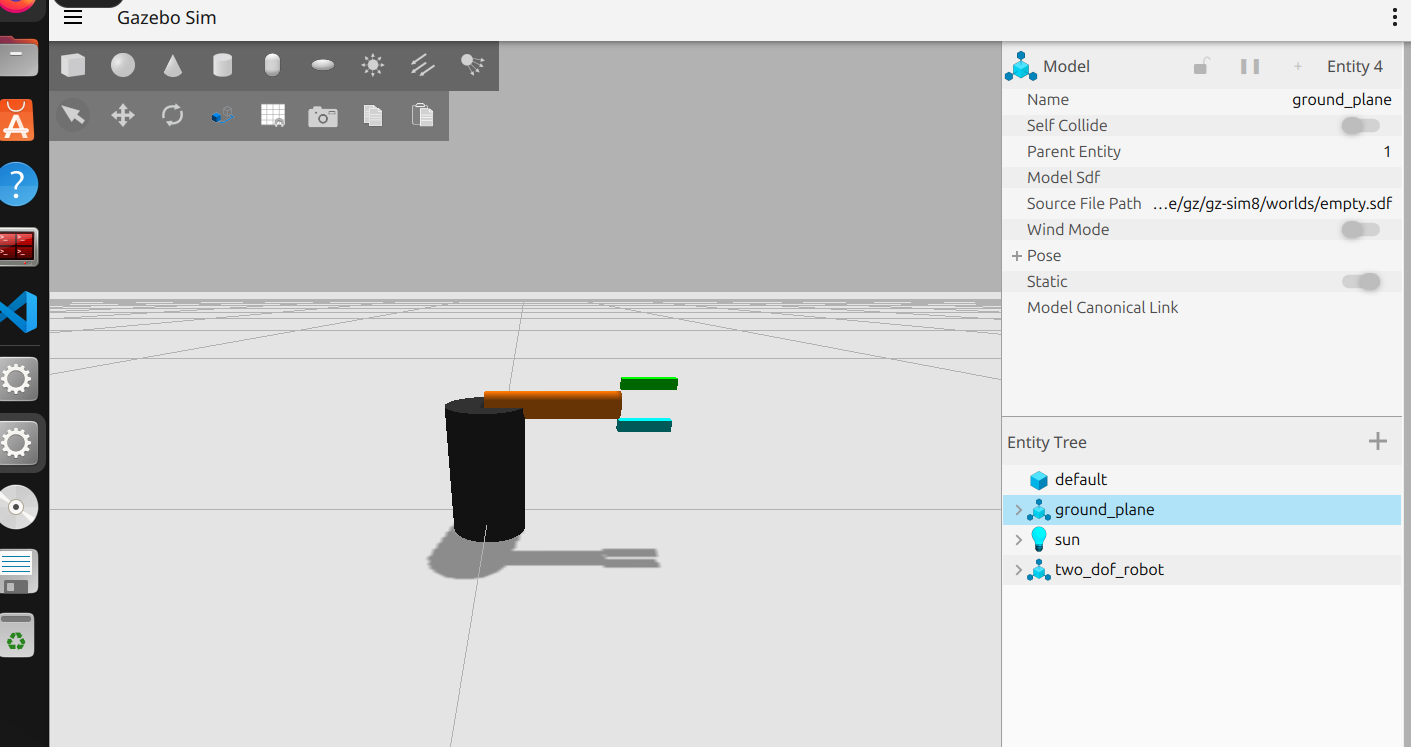
Before continuing this tutorial please run these commands:
sudo apt update
sudo apt upgrade
Modify XACRO - add inertia and collision tags
With the current URDF model we cannot visualize our robot in Gazebo because we haven’t defined any physical properties. We need to improve the URDF model by adding some physical and materialistic properties. To do that, we will create a new XACRO file and a new launch file. Again, we could just modify the ones we already have, but it is nice to compare to see differences.
- Create a new XACRO file in the urdf folder:
touch ~/ros2_ws/src/my_robotarm_pkg/urdf/my_robotarm_gazebo.xacro. - Create a new launch file in the launch folder:
touch ~/ros2_ws/src/my_robotarm_pkg/launch/my_robotarm_gazebo.launch.py. - Find the relevant files in the Github repo in the my_robotarm_pkg and copy-paste the content.
- Observe that each link in the new XACRO file have a
and tags as well as the tag which we had before. - Observe that in the new launch file we removed the node_joint_state_publisher_gui and put gazebo_sim to start the Gazebo simulator, node_spawn_entity to spawn the robot in it, and node_ros_gz_bridge to connecting ROS and Gazebo to be able to control our robot later on. The reason why we removed the joint state publisher is because now the Gazebo publishes the joint states from the actual physical robot state.
We are ready to run. Run these in your ~/ros2_ws directory.
cd ~/ros2_ws
colcon build
source install/setup.bash
ros2 launch my_robotarm_pkg my_robotarm_gazebo.launch.py
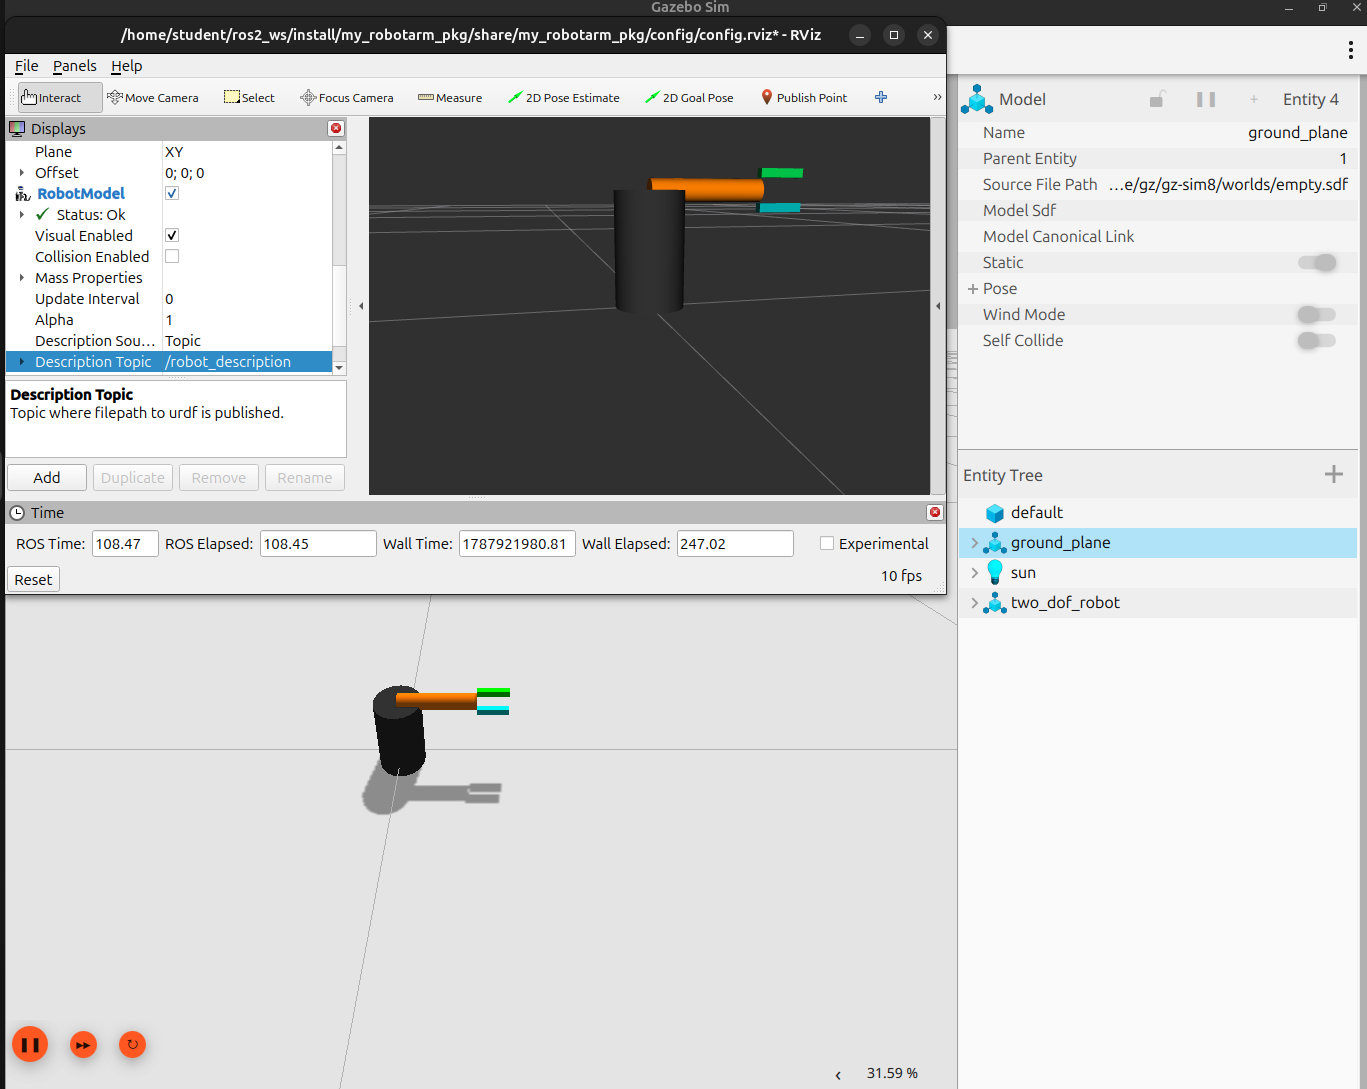
Finally, you should be able to see your colorful RR-manipulator in both RViz and Gazebo Sim. Note that you might need to add a new robot model in RViz to see your robot.
Adding controller
If you realized, your robot has started at the zero-position (vertical) and then fell to this bent position. The reason is that there is no controllers attached to the joints yet. There are different ways to control a robot manipulators; position control, velocity control etc. For this example we will do a position control in joint space; meaning that we will give joint angle values to move the robot where we want.
Currently, your Xacro file only defines the kinematic/visual geometry and the Gazebo joint state publisher (which reads joint angles). Your launch file only bridges simulation time and joint states back to ROS.
To command joint movements (position, velocity, or effort), you need to set up ROS 2 Control (ros2_control) alongside Gazebo’s control plugin.
Step 1: Add to your Xacro file
Add the hardware interface definition and Gazebo control plugin to your my_robotarm_gazebo.xacro file (just before </robot>):
~/ros2_ws/src/my_robotarm_pkg/urdf/my_robotarm_gazebo.xacro
<!-- ROS 2 Control Hardware Interface -->
  <ros2_control name="GazeboSimSystem" type="system">
    <hardware>
      <plugin>gz_ros2_control/GazeboSimSystem</plugin>
    </hardware>

    <joint name="joint1">
      <command_interface name="position"/>
      <state_interface name="position"/>
      <state_interface name="velocity"/>
    </joint>

    <joint name="joint2">
      <command_interface name="position"/>
      <state_interface name="position"/>
      <state_interface name="velocity"/>
    </joint>

    <joint name="right_finger_joint">
      <command_interface name="position"/>
      <state_interface name="position"/>
      <state_interface name="velocity"/>
    </joint>
  </ros2_control>

  <!-- Gazebo ROS 2 Control Plugin -->
  <gazebo>
    <plugin filename="gz_ros2_control-system" name="gz_ros2_control::GazeboSimROS2ControlPlugin">
      <parameters>$(find my_robotarm_pkg)/config/controllers.yaml</parameters>
    </plugin>
  </gazebo>
Step 2: Create a Controller Configuration File
Create a file named config/controllers.yaml inside my_robotarm_pkg:
cd ~/ros2_ws/src/my_robotarm_pkg
mkdir -p config
touch config/controllers.yaml
Now paste the content below in the controllers.yaml:
~/ros2_ws/src/my_robotarm_pkg/config/controllers.yaml
controller_manager:
  ros__parameters:
    update_rate: 100 # Hz

    joint_state_broadcaster:
      type: joint_state_broadcaster/JointStateBroadcaster

    arm_controller:
      type: joint_trajectory_controller/JointTrajectoryController

arm_controller:
  ros__parameters:
    joints:
      - joint1
      - joint2
      - right_finger_joint
    command_interfaces:
      - position
    state_interfaces:
      - position
      - velocity
Step 3: Install the config folder
Creating the file is not enough. colcon only copies files that setup.py lists in
data_files, and at runtime $(find my_robotarm_pkg)/config/controllers.yaml resolves to
the installed copy under install/, not to your src/ folder. If you skip this step the
build succeeds, but Gazebo reports that it cannot find the parameters file and no controller
is ever loaded.
Open setup.py and make sure data_files contains a line for config (the launch and
urdf lines should already be there from the earlier tutorials):
~/ros2_ws/src/my_robotarm_pkg/setup.py
data_files=[
    ('share/ament_index/resource_index/packages',
        ['resource/' + package_name]),
    ('share/' + package_name, ['package.xml']),
    (os.path.join('share', package_name, 'launch'), glob(os.path.join('launch', '*.launch.py'))),
    (os.path.join('share', package_name, 'urdf'), glob(os.path.join('urdf', '*.xacro'))),
    (os.path.join('share', package_name, 'config'), glob(os.path.join('config', '*.yaml'))),
],
These two imports have to be at the top of setup.py for the lines above to work:
import os
from glob import glob
Step 4: Spawn Controllers in Your Launch File
Add controller spawners to your launch file so ROS 2 automatically loads and starts them when Gazebo opens:
~/ros2_ws/src/my_robotarm_pkg/launch/my_robotarm_gazebo.launch.py
  # 1. Joint State Broadcaster Node
    node_joint_broadcaster = Node(
        package="controller_manager",
        executable="spawner",
        arguments=["joint_state_broadcaster"],
        output="screen",
    )

    # 2. Arm Controller Node
    node_arm_controller = Node(
        package="controller_manager",
        executable="spawner",
        arguments=["arm_controller"],
        output="screen",
    )
Don’t forget to add node_joint_broadcaster and node_arm_controller to your LaunchDescription[...] list in the end.
We are ready to run. Since we created a new folder and file, we must re-compile the whole workspace. Run these in your ~/ros2_ws directory.
cd ~/ros2_ws
colcon build
source install/setup.bash
ros2 launch my_robotarm_pkg my_robotarm_gazebo.launch.py
Finally run the necessary commands and observe on the terminal that the controllers are loaded successfully.
Step 5: Sending joint commands to your robot
You can either directly send joint commands to your robot via terminal or write a ROS-node for it. Here I will give you the terminal command and you can try the ROS-node version at home yourself.
Open a new terminal and paste this command:
ros2 action send_goal /arm_controller/follow_joint_trajectory control_msgs/action/FollowJointTrajectory "{
  trajectory: {
    joint_names: ['joint1', 'joint2', 'right_finger_joint'],
    points: [
      { positions: [1.0, 0.5, 0.02], time_from_start: { sec: 2, nanosec: 0 } }
    ]
  }
}"
Note that the way we command the robot is not through a simple topic; we use action/client structure. This subject will be covered later on.
Adding a camera sensor
So far our robot can move, but it cannot sense anything. Now we will mount a camera on it and stream the images into ROS so that we can see them in RViz.
Step 1: Create the camera XACRO
We will put the camera in its own file and define it as a xacro macro, so that the same camera can be attached to any link, at any pose, without copy-pasting.
touch ~/ros2_ws/src/my_robotarm_pkg/urdf/camera.xacro
Copy-paste the content from the my_robotarm_pkg.
Step 2: Include the camera macro in your robot
Add the include at the top of my_robotarm_gazebo.xacro, right after the <robot> tag,
and the macro call at the bottom, just before </robot>:
~/ros2_ws/src/my_robotarm_pkg/urdf/my_robotarm_gazebo.xacro
<xacro:include filename="$(find my_robotarm_pkg)/urdf/camera.xacro" />
Now we can place the camera as well. Add the next code block at the end of my_robotarm_gazebo.xacro, just before the </robot> and after the Gazebo ROS 2 Control Plugin.
<xacro:camera_sensor
  parent_link="base_link"
  x="0.20" y="0.0" z="0.25"
  roll="0" pitch="0.5" yaw="3.14159" />
This places the camera 20 cm in front of the base and 25 cm up, pitched down and turned around so that it looks back at the arm. Change these six numbers to move the camera.
Note that if you try to attach on the robot and physically crashone of the robot links, your camera or Gazebo might fail.
Step 3: Create a world that can render sensors
This is the step people miss, and it costs hours. Until now we launched Gazebo with -r empty.sdf.
That stock world loads only four system plugins: Physics, UserCommands, SceneBroadcaster and
Contact. It does not load gz-sim-sensors-system, and that is the plugin that renders
sensors and publishes their topics.
The result is silent: the XACRO is valid, check_urdf passes, the robot spawns normally, and
the camera simply never produces a single message. No error is printed anywhere.
So we need our own world. Create it:
mkdir -p ~/ros2_ws/src/my_robotarm_pkg/worlds
touch ~/ros2_ws/src/my_robotarm_pkg/worlds/my_world.sdf
Copy the stock empty.sdf as a starting point:
cp /opt/ros/jazzy/opt/gz_sim_vendor/share/gz/gz-sim8/worlds/empty.sdf ~/ros2_ws/src/my_robotarm_pkg/worlds/my_world.sdf
Unfortunately there is a little bug with the top comment. It is better to delete it. Just go in the my_world.sdf and delete anything in between <?xml version="1.0" ?> and <sdf version="1.6">.
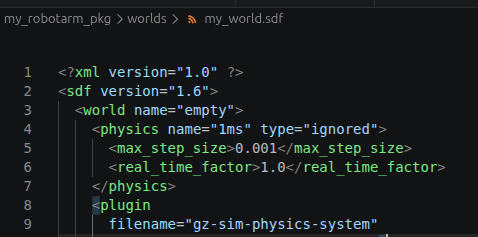
then add this plugin next to the other four <plugin> tags:
~/ros2_ws/src/my_robotarm_pkg/worlds/my_world.sdf
<plugin
  filename="gz-sim-sensors-system"
  name="gz::sim::systems::Sensors">
  <render_engine>ogre2</render_engine>
</plugin>
Keep the world name as <world name="empty">. The joint state topic in your XACRO and in the
bridge arguments is /world/empty/model/two_dof_robot/joint_state.Renaming the world breaks both of them with this setup.
Now we can modify our launch file to use this world file instead of the default empty one. Change the gazebo_sim = IncludeLaunchDescription(...) to the code block below.
world_file = os.path.join(package_path, 'worlds', 'my_world.sdf')

    gazebo_sim = IncludeLaunchDescription(
        PythonLaunchDescriptionSource(
            os.path.join(get_package_share_directory('ros_gz_sim'), 'launch', 'gz_sim.launch.py')
        ),
        launch_arguments={'gz_args': '-r ' + world_file}.items()
    )
Step 4: Point the launch file at your world
Now we can update our gazebo_sim launcher with the new world. Replace it with the codeblock below:
~/ros2_ws/src/my_robotarm_pkg/launch/my_robotarm_gazebo.launch.py
world_file = os.path.join(package_path, 'worlds', 'my_world.sdf')

gazebo_sim = IncludeLaunchDescription(
    PythonLaunchDescriptionSource(
        os.path.join(get_package_share_directory('ros_gz_sim'), 'launch', 'gz_sim.launch.py')
    ),
    launch_arguments={'gz_args': '-r ' + world_file}.items()
)
Then add the two camera topics to the bridge, node_ros_gz_bridge node in the same launch file, so that Gazebo’s images become ROS messages:
arguments=[
    '/clock@rosgraph_msgs/msg/Clock[gz.msgs.Clock',
    '/world/empty/model/two_dof_robot/joint_state@sensor_msgs/msg/JointState[gz.msgs.Model',
    '/camera/image_raw@sensor_msgs/msg/Image[gz.msgs.Image',
    '/camera/camera_info@sensor_msgs/msg/CameraInfo[gz.msgs.CameraInfo'
],
The [ in each argument means one way, Gazebo to ROS. The camera only produces data, so we never need to send anything back.
Step 5: Install the worlds folder
Same trap as the config folder in the previous section: a new folder needs a new data_files
entry, otherwise my_world.sdf never reaches install/ after compiling the ROS2 workspace, and the launch file cannot find it.
~/ros2_ws/src/my_robotarm_pkg/setup.py
(os.path.join('share', package_name, 'worlds'), glob(os.path.join('worlds', '*.sdf'))),
Step 6: Run and look at the image
cd ~/ros2_ws
colcon build
source install/setup.bash
ros2 launch my_robotarm_pkg my_robotarm_gazebo.launch.py
In another terminal, check that the images really are arriving on the ROS side:
ros2 topic list | grep camera
ros2 topic hz /camera/image_raw
You should see /camera/image_raw and /camera/camera_info. In RViz, press Add, choose
the Image display, and set its topic to /camera/image_raw.
Do not worry if ros2 topic hz reports something far below the 30 Hz we asked for. If your machine has no GPU, Gazebo renders on the CPU and a few Hz is normal. The camera is working; it is only slow.
So now your my_robotarm_gazebo.xacro should be identical to my_robotarm_gazebo_with_control_and_camera.xacro, your my_robotarm_gazebo.launch.py should be identical to my_robotarm_gazebo_final.launch.py in Github page as my_robotarm_pkg. If you are seeing any errors or missed a step, you can use them to debug your package. Just be careful! You cannot just copy-paste the whole my_robotarm_pkg in your ros2_ws when your version of the same package exist - and simply renaming the folder is not enough.