Machine Learning
In this assignment you will work with the code example with KerasCV in Google Collab found here: Object detection with KerasCV in Google Collab.
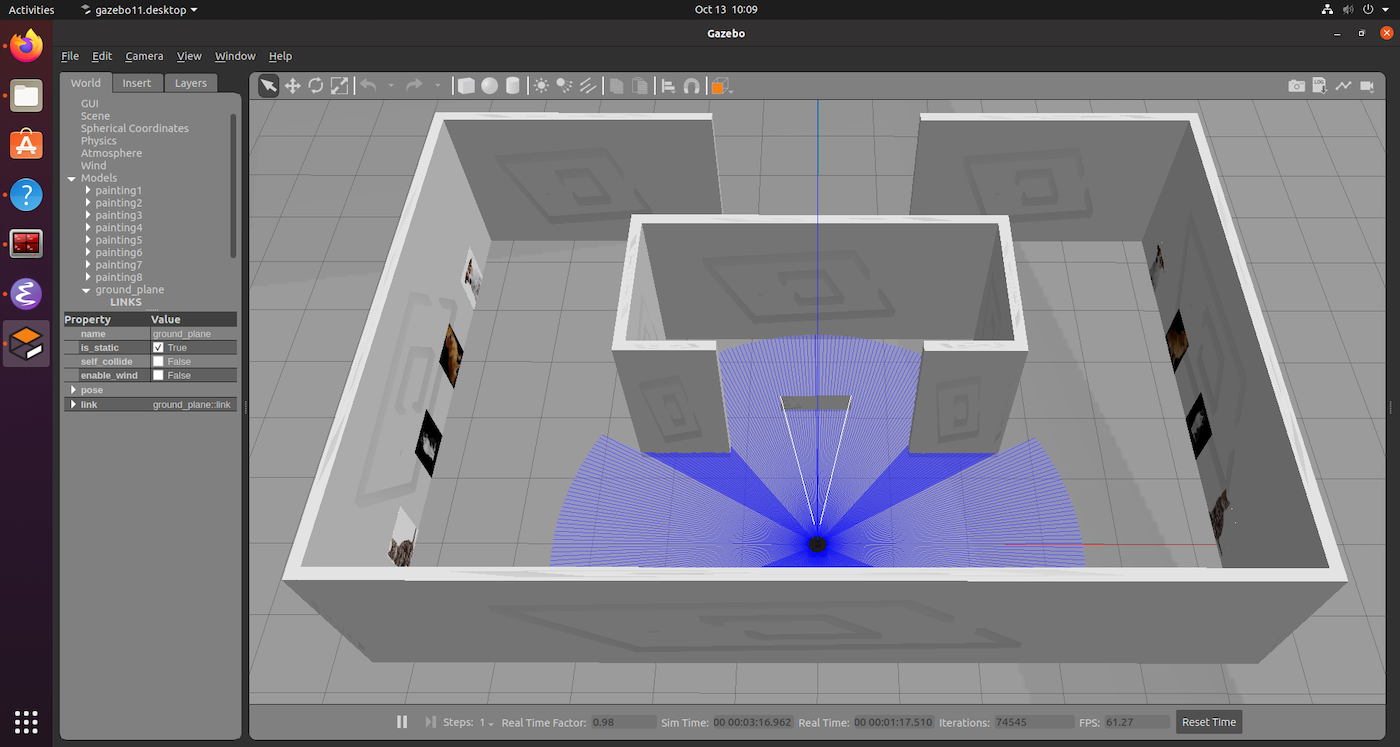
You will explore how well this pretrained YOLOv8 network can detect images of cats and dogs on the walls of a virtual environment in Gazebo, from the point of view of the Turtlebot robot. You will work with a teleoperated Turtlebot in a simulated environment. The robot is equipped with a camera that provides a stream of images to a '/camera/image_raw' topic.
Your task is to gather a set of images with the robot under different conditions, to use a pretrained YOLOv8 in KerasCV to detect the animals, to show under what conditions the predictions gets worse, and to show the robustness of the deep learning regardless of significant changes in raw RGB values.
 The Gazebo environment for the robot learning assignment.
Setup Process
- Open a new terminal by pressing: Ctrl+Alt+T
- Change directory into the source folder of your ROS2 workspace:
cd ~/ros2_ws/src - Create a ROS2 python package with the name robot_ml:
ros2 pkg create --build-type ament_python robot_ml - Copy the folders launch, models and worlds from the ros2_students_25/robot_ml git repository to your newly created package (ros2_ws/src/robot_ml)
- In ROS2 the python scripts of packages are located in a folder with the same name as the package. Copy the files camera_viz.py and project_ml_idea.py from the ros2_students_25/robot_ml git repository to the scripts folder of your package (ros2_ws/src/robot_ml/robot_ml)
- In the setup.py file of your package add the following lines:
# Add after: from setuptools import setup import os from glob import glob # In order to be able to access the added files during runtime we add we add them to data_files # Add after: ('share/' + package_name, ['package.xml']), (os.path.join('share', package_name, 'launch'), glob(os.path.join('launch', '*.launch.py'))), (os.path.join('share', package_name, 'worlds'), glob(os.path.join('worlds', '*.world'))), (os.path.join('share', package_name, 'models', 'painting', 'materials', 'scripts'), glob('models/painting/materials/scripts/*')), (os.path.join('share', package_name, 'models', 'painting', 'materials', 'textures'), glob('models/painting/materials/textures/*')), # To make our python script excecutable with ros2 run, we add a entry_points definition # Add after: 'console_scripts': [ 'camera_viz = robot_ml.camera_viz:main', 'project_ml_idea = robot_ml.project_ml_idea:main', - Move to workspace directory, build your workspace and source it:
cd ~/ros2_ws colcon build --symlink-install source install/setup.bash - To launch the Gazebo simulation with the Turtlebot in an environment with images of cats and dogs on the walls use:
ros2 launch robot_ml spawn_robot.launch.py
Assignment Steps in Gazebo
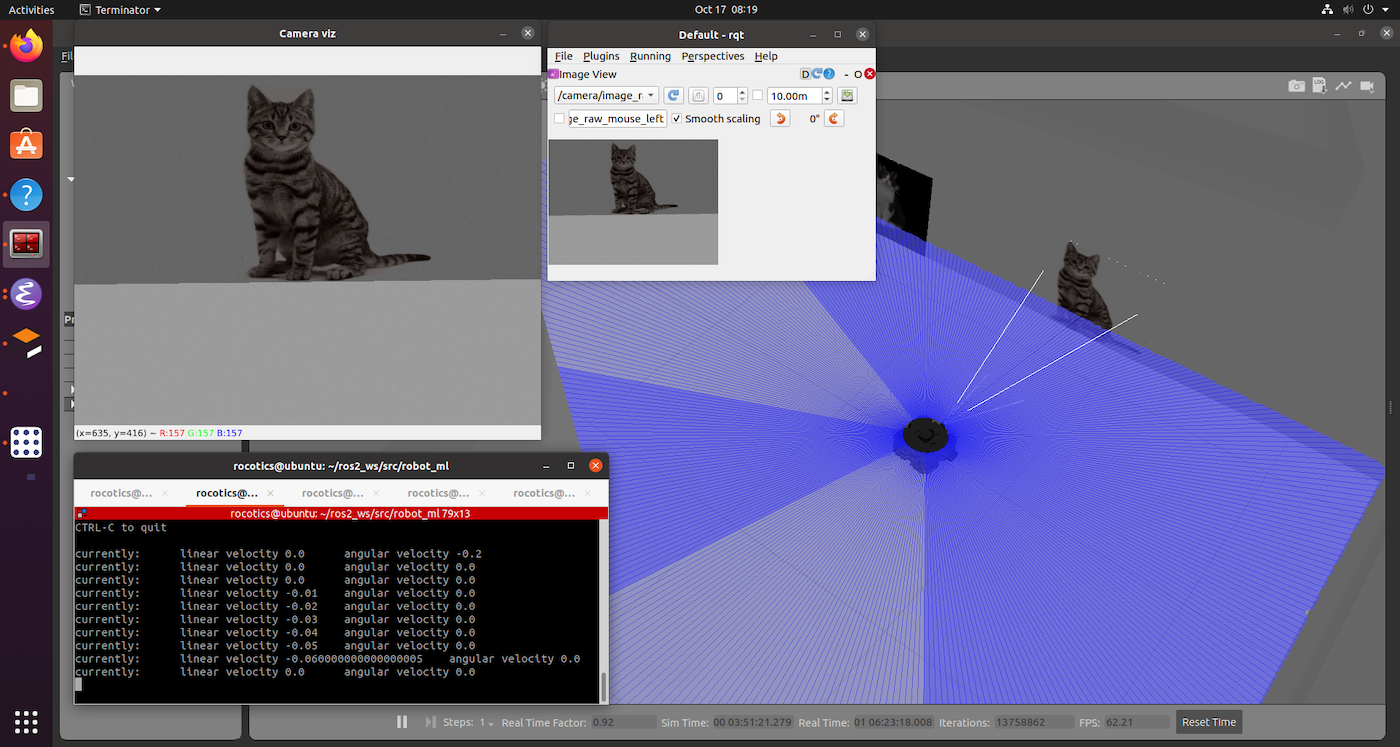
- In a separate terminal run the camera_viz node to visualize the camera stream from the Turtlebot, and to read off RGB values with the mouse pointer:
ros2 run robot_ml camera_viz - In a separate terminal run rqt, which will enable you to save images from the camera stream to file:
rqt - In rqt, navigate to the top menu and select Plugins->Visualization->Image View
- If the camera view does not automatically appear, select the correct topic from the drop-down list
- In a separate terminal run a teleoperation node, for example:
ros2 run turtlebot3_teleop teleop_keyboard - Teleoperate the robot to one of the 8 animal pictures in the environments. On each wall there is two images of cats, and two of dogs. Half on a light background, half on a dark background. One wall is well-lit, the other is more in shadow.
- Save an image file using rqt of each picture on the wall, at a distance where the animal is clearly visible while not including other animals in image
- For each picture use the camera_viz node to sample the RGB values at a point you choose in each image. For example in a corner of the image, in a white patch of fur, or similar. Note down the values for each image. Avoid black areas as will not change much with lighting. Values +- 10 are ok, they will oscillate unless robot is completely still.
- You should now have 8 images, and 8 RGB value sets.
 The robot in position to take an image with rqt, and sample the RGB values with the camera_viz node.
Assignment Steps in Google Colab
- Upload the set of 8 images into Google Drive to access them in Google Colab (Files, symbol of folder in left menu->Upload to session storage)
- Modify the code example with KerasCV (linked to at top) to load an image “locally”, using for example:
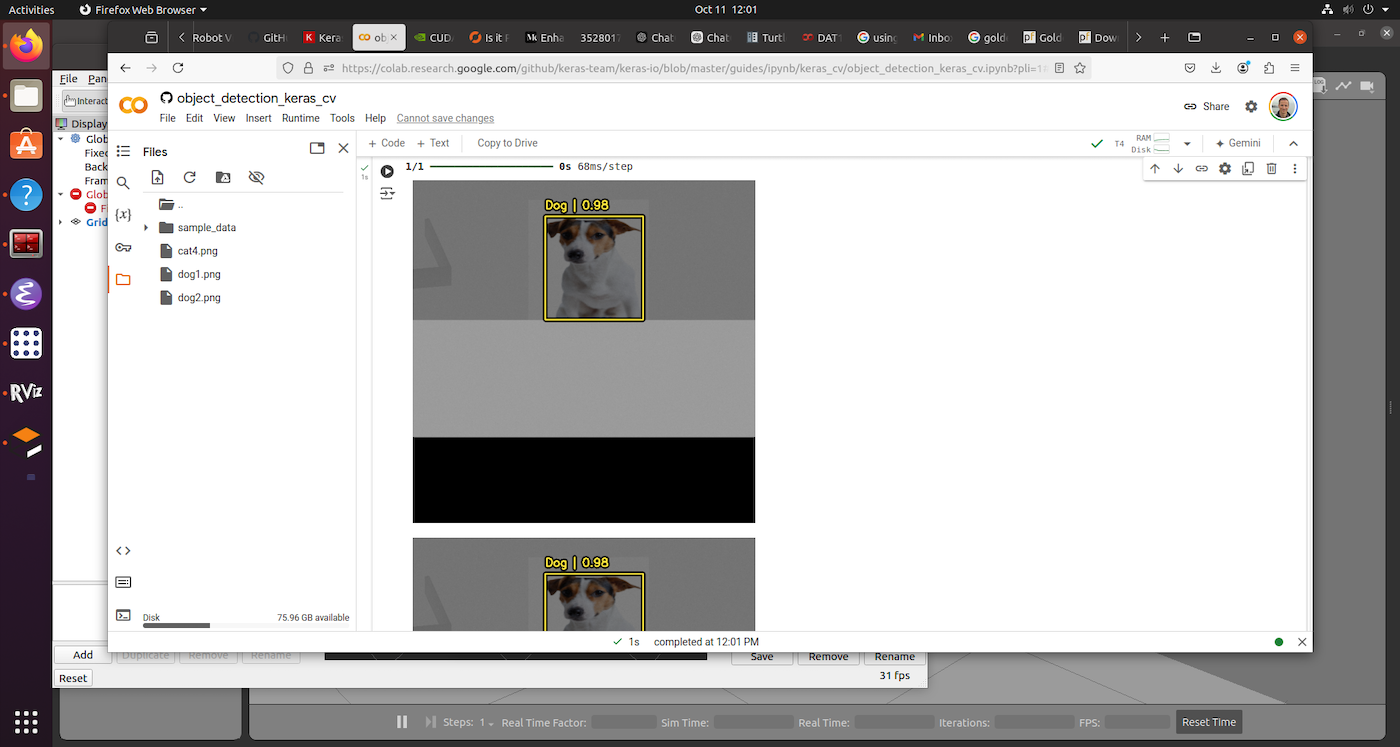
image = keras.utils.load_img("cat1.jpg") - Run a prediction for each image with 640x640 size, and note down the prediction results (class detected and confidence value, 0.00 to 1.00)
- Re-run a prediction for each image with 320x320 size, and note down the prediction results (class detected and confidence value, 0.00 to 1.00)
 One of the dogs detected with KerasCV in Google Colab.
Presenting your results
- To document your experiment you need to make 3x tables and a small discussion paragraph
- 2x prediction tables: Present your prediction results like this, one for each resolution used:
| Cat 1 | Cat 2 | Dog 1 | Dog 2 | |
|---|---|---|---|---|
| Lit wall | % | % | % | % |
| Shadowed wall | % | % | % | % |
- RGB table: Present your RGB values like this:
| Cat 1 | Cat 2 | Dog 1 | Dog 2 | |
|---|---|---|---|---|
| Lit wall | R,G,B | R,G,B | R,G,B | R,G,B |
| Shadowed wall | R,G,B | R,G,B | R,G,B | R,G,B |
- Discussion: Include a brief discussion of the results, minimum 1 paragraph. Discuss how well you think the prediction was overall, and the robustness to e.g. different colour backgrounds, different lighting, different perspectives, and different resolutions used. Compare with the differences in RGB values between lit and shadowed images, and comment on how well a simple detector based on colour in the RGB colour space would work.
- Submit the assignment as a single pdf document, showing the 8x images, the 3x tables, and the discussion on Canvas by the deadline.